
Microsoft Defender for Endpoint Part 5: Live Response & Automated Investigation
Master interactive endpoint forensics with Live Response and leverage AI-powered Automated Investigation and Response (AIR) to reduce analyst workload and accelerate threat remediation.

From Incident Management to Deep Forensics and Automation
In Part 4, we explored incident management and security stack integration—how to investigate complex, multi-stage attacks using the incident investigation interface and integrate MDE with your broader security ecosystem for unified threat visibility.
Now we advance to two powerful capabilities that elevate your security operations: Live Response for hands-on forensic investigation and Automated Investigation and Response (AIR) for AI-powered threat analysis and remediation.
Live Response provides a secure remote shell connection to endpoints, allowing real-time forensic investigation without VPN or remote desktop access. Whether you need to examine suspicious files, collect evidence, analyze running processes, or perform emergency remediation, Live Response gives you direct access to endpoints even when they’re isolated from the network.
Automated Investigation and Response leverages AI and machine learning to automatically investigate alerts, determine threat scope, and recommend or implement remediation actions. As discussed in Part 1, AIR significantly reduces Mean Time to Response (MTTR) and helps security teams handle alert volume at scale.
Together, these capabilities transform your security operations combining human expertise through Live Response with AI-powered efficiency through AIR.
If you enjoy reading my blog, don’t forget to hit the subscribe button!
Live Response: Interactive Endpoint Forensics
Live Response is MDE’s most powerful hands-on investigation tool, providing a secure command-line interface to endpoints for deep forensic analysis.
 assets - Thomas Naunheim")
What is Live Response?
Live Response establishes a secure, encrypted connection from the Defender portal to an endpoint through MDE’s cloud infrastructure. This connection:
Works even when devices are isolated from the corporate network
Doesn’t require VPN or remote desktop access
Maintains complete audit logging of all commands executed
Provides granular RBAC control over who can initiate sessions
Operates through MDE’s cloud service, bypassing network restrictions
When to we can use Live Response
Deep Forensic Analysis:
Examine files, memory, or system state beyond what’s visible in the portal
Investigate suspicious processes or services
Analyze registry keys and scheduled tasks
Review event logs for additional context
Custom Evidence Collection:
Gather specific artifacts not included in standard investigation packages
Collect files for offline malware analysis
Extract memory dumps for advanced forensics
Retrieve specific registry hives or event logs
Rapid Remediation:
Immediately delete malicious files
Kill suspicious processes
Disable malicious services or scheduled tasks
Modify configurations to contain threats
Isolated Device Investigation:
Investigate devices that have been isolated from the network
Continue forensic work without reconnecting devices
Remediate threats before removing isolation
Complex Investigations:
When portal investigation tools don’t provide enough detail
Need to run custom scripts or forensic tools
Require interactive troubleshooting
Multiple investigation steps needed in sequence
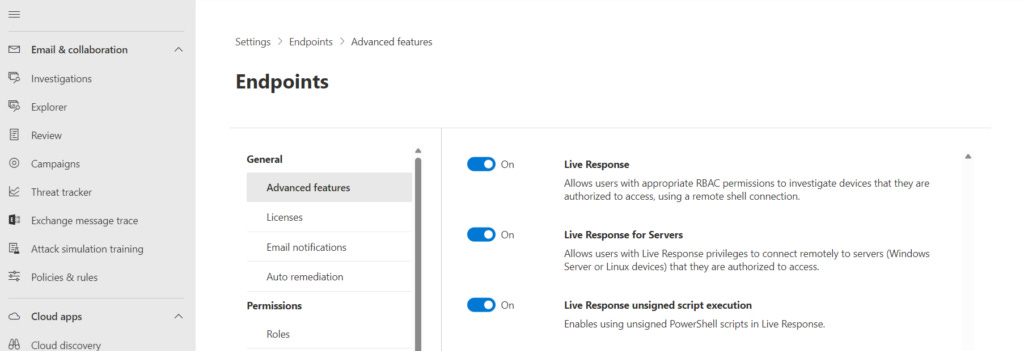
Enabling Live Response
Navigate to Settings > Endpoints > Advanced Features and enable:
Live Response: Enables basic Live Response functionality with built-in commands
Live Response for Servers: Separately enable for Windows Server devices (disabled by default for additional security)
Live Response Unsigned Script Execution: Allows running unsigned scripts from the library (use with caution; recommended to require script signing)
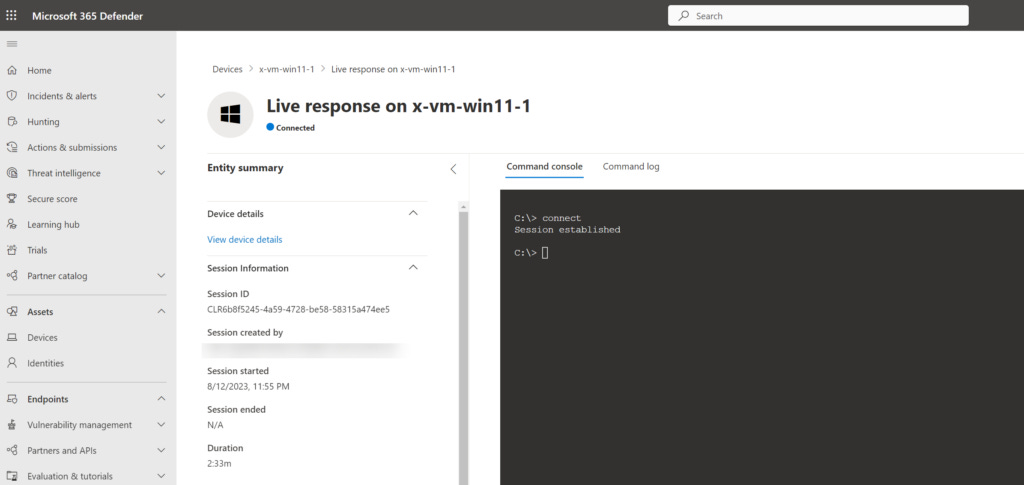
Initiating a Live Response Session
From Device Page:
Navigate to the device you want to investigate
Click Actions > Initiate Live Response Session
Wait for connection establishment (typically 10-30 seconds)
Console opens with command prompt
From Incident/Alert Page:
While investigating an incident or alert
Click on an affected device
Select Initiate Live Response Session
Session Indicators:
Green indicator: Connection established, ready for commands
Yellow indicator: Connecting or slow response
Red indicator: Connection failed or session terminated
Live Response Commands Overview
Live Response provides two tiers of commands: Basic and Advanced.
Basic Commands include:
Navigation and file system commands (cd, dir, type)
File investigation commands (findfile, fileinfo)
Process investigation commands (processes, connections, drivers)
Registry investigation commands (registry query/set)
Persistence detection commands (persistence)
Evidence collection commands (getfile, putfile)
Analysis commands (analyze, schedtasks, services)
Advanced Commands include:
Remediation commands (remediate, undo)
Script execution (run)
Custom command execution
For a complete list of Live Response commands with detailed syntax and examples, refer to the official Microsoft documentation:
Live Response Commands Reference: Microsoft Defender for Endpoint Live Response Commands.
Limitations of Live Response
A maximum of 25 live response sessions can run simultaneously across the environment.
Each session has an inactive timeout of 30 minutes.
Individual commands are limited to 10 minutes of execution time, except for the following commands, which can run up to 30 minutes:
getfilefindfilerun
A single user can initiate up to 10 concurrent sessions.
A device can participate in only one active session at a time.
File size limitations:
getfile: 3 GB maximumfileinfo: 30 GB maximumlibrary: 250 MB maximum
Automated Investigation and Response (AIR)
As discussed in Part 1, Automated Investigation and Remediation (AIR) uses AI and machine learning to automatically investigate alerts, determine threat scope, and recommend or implement remediation actions significantly reducing Mean Time to Response (MTTR).

How AIR Works
When an alert is triggered, AIR can automatically launch an investigation based on configured automation levels.
AIR Investigation Workflow:
1. Automated Triage:
AIR evaluates the alert using:
Severity and Confidence: High-severity, high-confidence alerts get priority
Affected Assets: Business-critical systems receive immediate attention
Threat Intelligence: Known threat actor behaviors trigger automated response
Historical Data: Similar past incidents inform current investigation
Current Workload: Balances automated investigations with analyst capacity
Based on assessment, AIR decides whether to:
Investigate automatically
Wait for manual analyst initiation
Skip investigation (very low severity/confidence)
2. Investigation Playbooks:
AIR follows predefined investigation playbooks tailored to specific threat categories for example:
Malware Playbook:
Analyzes suspicious file properties (hash, signature, prevalence)
Checks file reputation across Microsoft threat intelligence
Identifies all devices where file exists
Examines related files (same hash family, similar behavior)
Checks for lateral spread patterns
Determines malware family and capabilities
3. Evidence Collection:
During investigation, AIR automatically gathers:
File Samples: Suspicious files and their hashes
Process Execution Trees: Parent-child process relationships
Network Connection Logs: C2 communications, data exfiltration attempts
Registry Modifications: Persistence mechanisms, configuration changes
User Activity Logs: Authentication events, file access, application usage
Related Alerts: All alerts from past 30 days involving same entities
4. Verdict and Recommendations:
After analysis, AIR provides:
Verdict:
Malicious: High confidence threat requiring immediate action
Suspicious: Indicators of compromise but below certainty threshold
Clean: Benign activity incorrectly flagged (false positive)
Unknown: Insufficient data to determine threat level
Confidence Score: 0-100% indicating certainty level

Recommended Actions:
File Actions:
Quarantine malicious files across all affected devices
Block file hashes organization-wide
Allow known-good files to prevent future false positives
Device Actions:
Isolate compromised devices from network
Restrict app execution to Microsoft-signed executables only
Run full antivirus scan
Collect investigation package for manual review
User Actions:
Disable compromised user accounts
Require password reset
Mark account as compromised in Azure AD
Network Actions:
Block malicious IPs and domains
Add C2 infrastructure to indicators list
Alert on future connections to suspicious infrastructure
5. Action Approval and Execution:
Depending on configured automation level:
No Automated Response:
AIR only generates investigation results
All actions require manual analyst approval
Use for: High-value systems requiring human review
Semi-Automated:
AIR automatically investigates
Remediation actions held for approval in Action Center
Analyst reviews and approves/rejects actions
Use for: Balance of automation and control
Full Automation:
AIR investigates and remediates high-confidence threats automatically
Low-confidence findings still require approval
Use for: Standard workstations, non-critical systems
Configuring AIR Automation Levels
Navigate to Settings > Endpoints > Advanced Features > Automation Level to configure per device group.
Automation Level Options:
Full - remediate threats automatically:
AIR handles everything from investigation to remediation
Best for: Standard user workstations, non-critical systems
Risk: Minimal; malware is neutralized fastest
Analyst involvement: Only for complex or low-confidence cases
Semi - require approval for any remediation:
AIR investigates automatically
All remediation actions require manual approval
Best for: Critical servers, production systems, executive devices
Risk: Balanced; human oversight prevents errors
Analyst involvement: Review and approve all actions
Semi - require approval for core folders remediation:
AIR can remediate automatically except for files in protected folders (Documents, Desktop, Program Files)
Remediation in core folders requires approval
Best for: Systems where some automation is acceptable but user data needs protection
Risk: Moderate; protects important user files
Analyst involvement: Approve actions affecting core folders only
Semi - require approval for non-temp folders remediation:
AIR can automatically remediate files in temp folders
Files outside temp folders require approval
Best for: Systems where temp folder threats are common
Risk: Moderate; temp folder threats handled automatically
Analyst involvement: Approve actions outside temp folders
No automated response:
AIR doesn’t run automatically
Analyst must manually initiate investigations
Best for: High-security environments, systems under strict change control
Risk: Higher response time but maximum control
Analyst involvement: All investigations manual
Monitoring Automated Investigations
Navigate to Incidents & Alerts > Incidents > Investigations > Automated Investigations to view all AIR investigations.
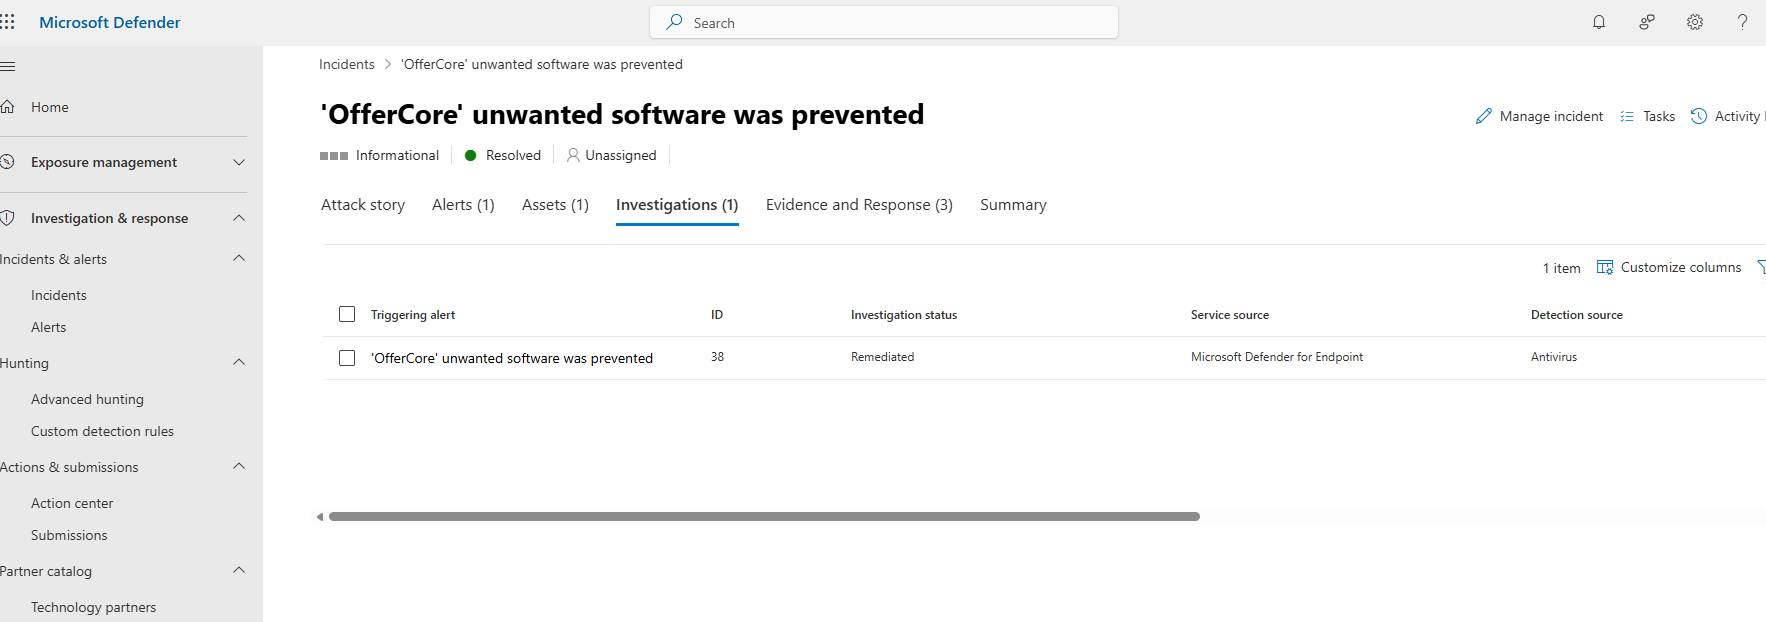
Investigation States:
Running:
Investigation currently in progress
Shows elapsed time and current investigation step
Can view real-time progress
Pending Approval:
Investigation complete
Remediation actions awaiting analyst approval
Shows recommended actions in Action Center
Remediated:
Investigation complete
All actions executed successfully
Threats neutralized
Partially Remediated:
Some actions succeeded
Some actions failed (device offline, file already deleted, insufficient permissions)
Review failures for manual remediation
Failed:
Investigation encountered errors
No actions taken
Requires manual investigation
Terminated:
Investigation was manually stopped by analyst
Actions taken before termination remain in effect
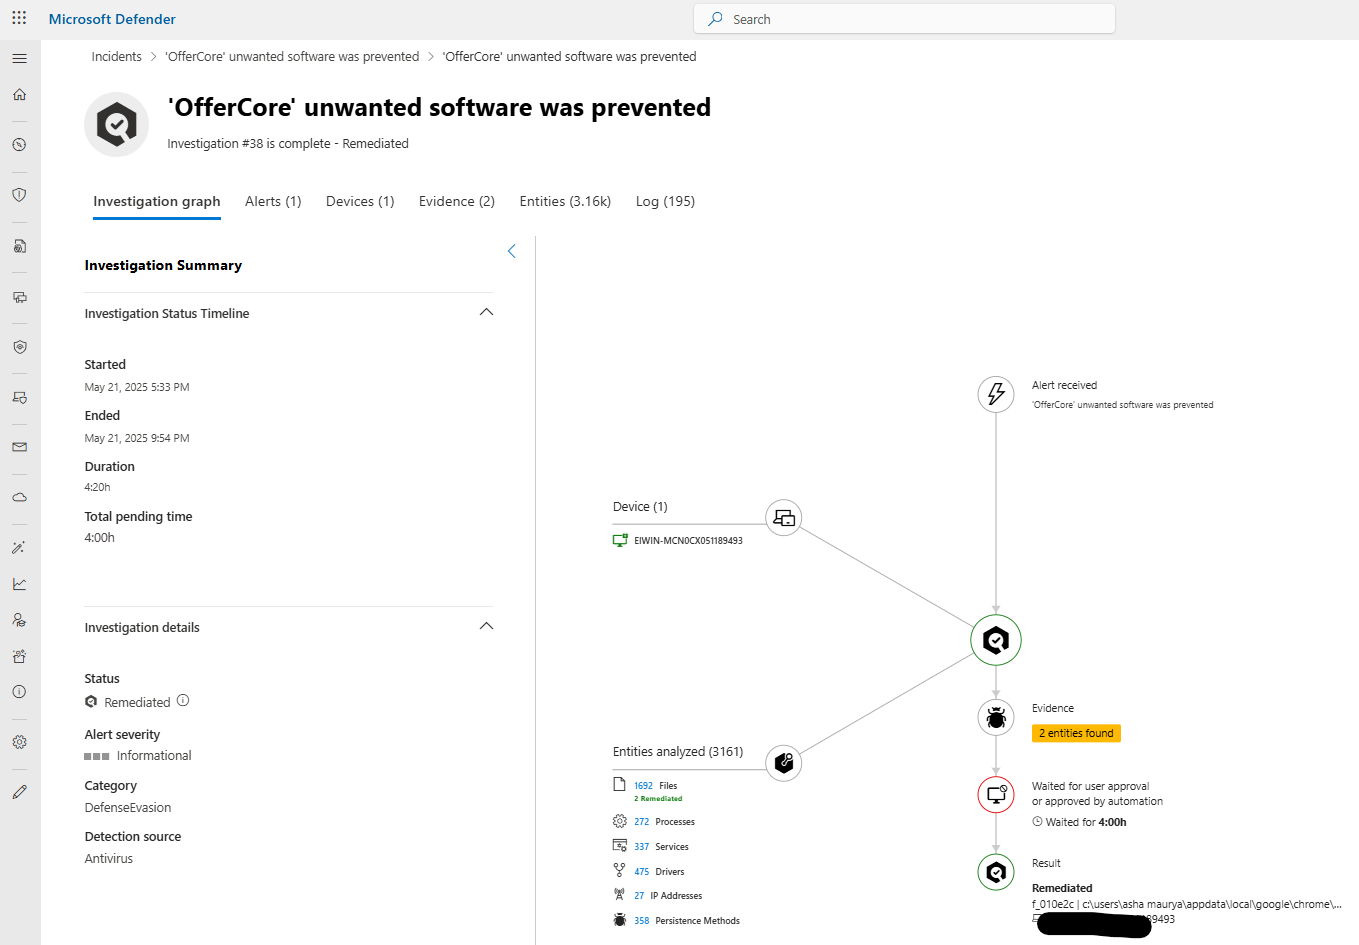
Investigating AIR Results
Click on any automated investigation to view detailed results:
Investigation Summary:
Start and end time
Total duration
Verdict (Malicious/Suspicious/Clean/Unknown)
Confidence level (percentage)
Number of entities analyzed
Number of actions recommended/taken
Investigation Graph:
Visual representation showing:
All entities involved (devices, files, processes, users, IPs)
Relationships between entities
Alert triggers that initiated investigation
Evidence collected
Actions taken
Investigation Steps:
Chronological log of everything AIR did:
Entities examined
Queries executed
Evidence evaluated
Decisions made at each step
Actions recommended/taken
Reasoning for each decision
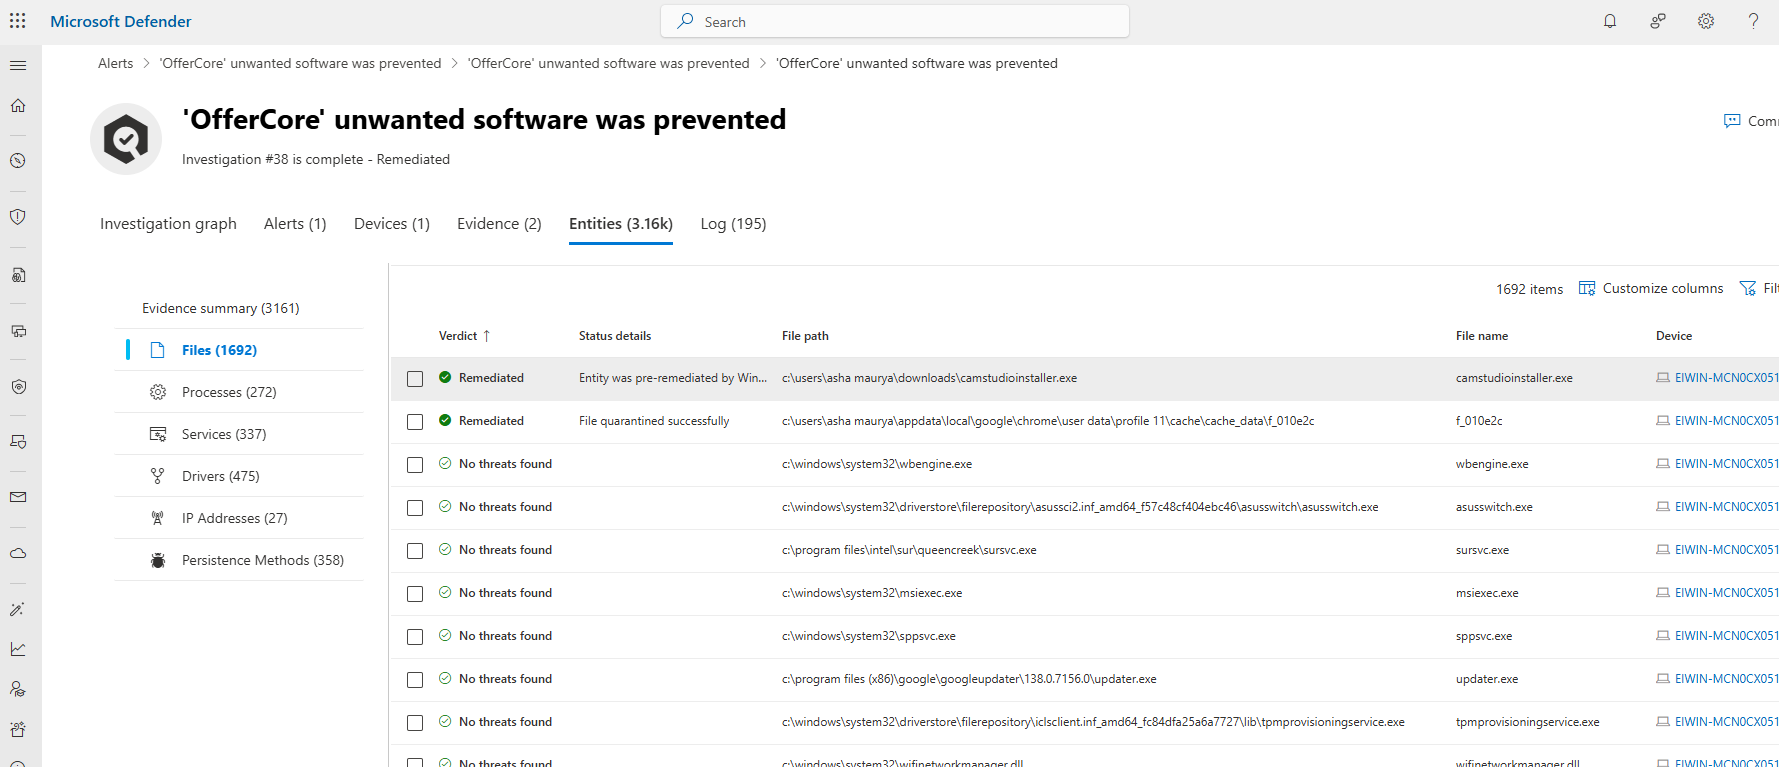
Entities Analyzed:
Complete list of all entities investigated:
Files (with verdict, hash, prevalence)
Processes (with command line, parent process, behavior)
Users (with risk level, activity patterns)
Devices (with health status, other alerts)
IPs/Domains (with reputation, connections)
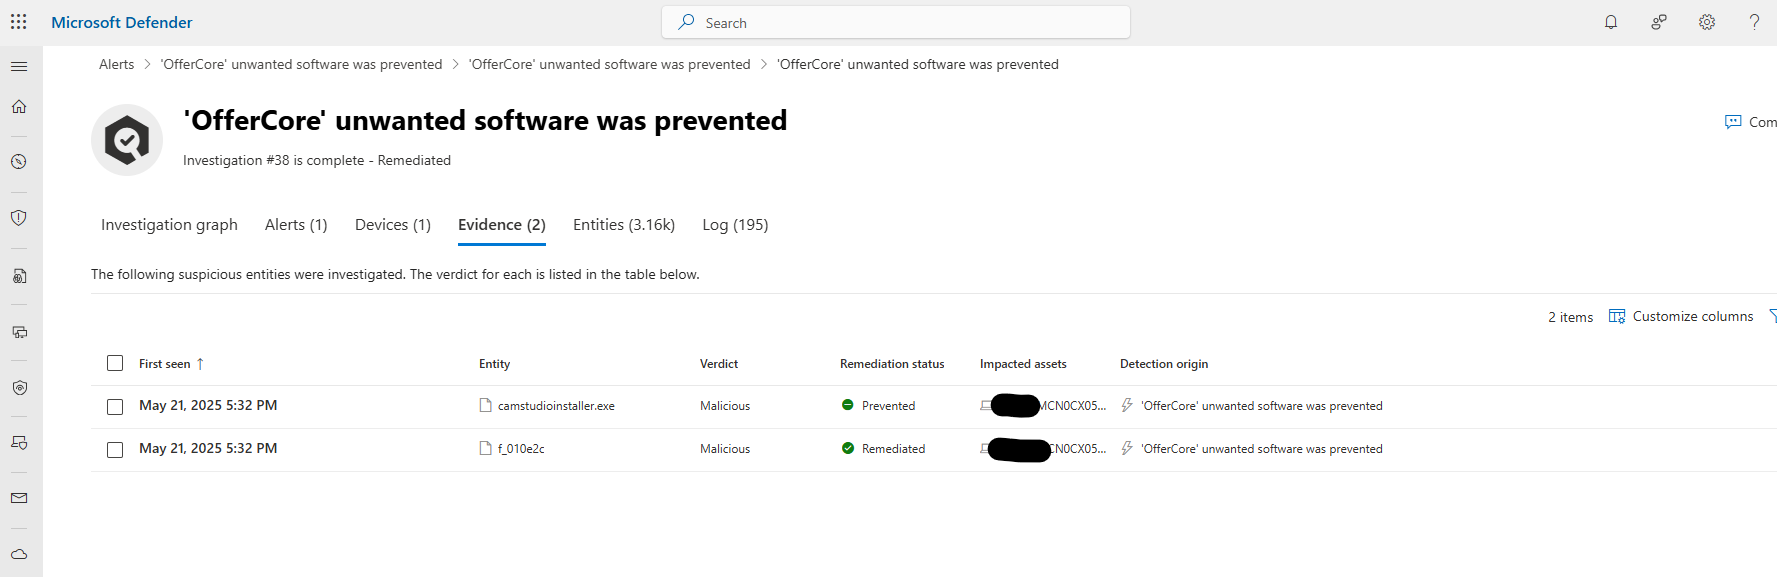
Evidence Tab:
All collected evidence with verdicts:
Malicious evidence (confirmed threats)
Suspicious evidence (potential threats)
Clean evidence (false positives)
Unknown evidence (insufficient data)
Actions Taken/Recommended:
List of all actions with:
Action type (quarantine, block, isolate, disable)
Target entity
Status (completed/pending/failed)
Timestamp
Result details
Action Center: Managing Pending Actions
The Action Center is your centralized location for reviewing and approving pending actions from automated investigations.
Accessing Action Center
Navigate to Actions & Submissions > Action Center in the Defender portal.

Action Center Tabs
Pending Tab:
Shows all actions awaiting approval:
File quarantine operations
Device isolation requests
User account suspensions
IP/domain blocking rules
File hash blocking
For each action:
Action Details: What will be done
Target: Which file, device, or user
Justification: Why AIR recommends this action
Evidence: Supporting evidence from investigation
Impact Assessment: Potential business impact
Approval Options: Approve, Reject, or Defer
History Tab:
Shows all completed actions:
Actions approved and executed
Actions rejected by analysts
Actions automatically executed (in full automation mode)
Actions that failed during execution
For each historical action:
Action type and target
Execution timestamp
Result (success/failure)
Which analyst approved (if manual approval)
Undo capability (for reversible actions)
Unified Action Center (with full Microsoft Defender XDR):
If you have other Defender products, Action Center shows pending actions from:
Defender for Endpoint
Defender for Office 365 (email remediation)
Defender for Identity (account actions)
Automated investigation playbooks from all platforms
Approving or Rejecting Actions
Approval Workflow:
Navigate to Action Center > Pending tab
Click on a pending action
Review investigation details:
Full investigation results
Evidence supporting the action
Entities involved
Risk assessment
Make decision:
Approve: Action will execute immediately
Reject: Action will not be taken; add rejection reason
Defer: Postpone decision; action remains in Pending queue
Approval Considerations:
When to Approve:
High-confidence verdicts (Malicious with 90%+ confidence)
Clear evidence of threat
Minimal business impact
Aligns with known threat patterns
Previous similar actions successful
When to Reject:
Potential false positive indicators
Business-critical files or systems involved
Insufficient evidence
Actions could disrupt operations
Need additional investigation first
When to Defer:
Need more information
Waiting for business unit consultation
Subject matter expert review required
After-hours action best executed during business hours
Bulk Actions:
For multiple similar pending actions:
Select multiple actions using checkboxes
Click “Approve Selected” or “Reject Selected”
Add bulk comment explaining decision
All selected actions processed simultaneously
Undoing Actions
Some actions are reversible through the Action Center:
Reversible Actions:
File Quarantine: Restore from quarantine
File/IP/Domain Block: Remove from indicators list
Device Isolation: Release device back to network
Non-Reversible Actions:
User Account Disable: Must re-enable manually in Azure AD
File Deletion: File is permanently removed
Password Reset: User must set new password
Undo Workflow:
Navigate to Action Center > History tab
Find the action to reverse
Click “Undo”
Confirm undo action
System reverses the action
Undo Considerations:
Only undo if action was incorrect (false positive)
Add comment explaining why undo was necessary
Monitor the entity after undo to ensure it’s legitimate
Consider tuning detection rules to prevent future false positives
Combining Live Response and AIR
The most powerful security operations combine human expertise through Live Response with AI-powered efficiency through AIR.
When to Use Both
AIR for Initial Triage:
Let AIR handle initial investigation and evidence collection
Review AIR findings for completeness
Identify gaps requiring deeper investigation
Live Response for Deep Dive:
When AIR verdict is “Unknown” or low-confidence “Suspicious”
Complex threats requiring custom forensic tools
Need to collect specific artifacts AIR doesn’t gather
Validate AIR findings before approving high-impact actions
Example Workflow:
Alert Generated: Suspicious PowerShell execution detected
AIR Investigates: Automatically analyzes file, process tree, network connections
AIR Verdict: “Suspicious” (70% confidence) - recommends file quarantine
Analyst Reviews: AIR findings show encoded commands and external network connection
Live Response Session: Analyst initiates Live Response for deeper analysis
Examines full process tree
Checks for additional persistence mechanisms
Collects PowerShell history
Reviews recent file modifications
Analyst Decision: Confirms threat, approves AIR remediation actions
Result: Threat contained with high confidence, evidence preserved
Conclusion
You’ve now mastered two of MDE’s most powerful capabilities—Live Response for hands-on forensic investigation and Automated Investigation and Response for AI-powered threat analysis and remediation.
Key takeaways from Part 5:
Live Response provides secure, remote access to endpoints for deep forensic analysis
The Live Response library enables deployment of custom tools and scripts
AIR leverages AI and machine learning to automatically investigate and remediate threats
Automation levels can be configured per device group for balanced security and control
The Action Center provides centralized management of pending remediation actions
Combining Live Response and AIR creates the most effective security operations
In future blogs, we’ll cover the complete investigation workflow and response actions in detail. You’ll learn the systematic six-step investigation process, how to analyze entities and evidence thoroughly, leverage threat intelligence context, classify alerts accurately, and execute appropriate response actions for devices, files, and user accounts.
Stay tuned for comprehensive investigation techniques and response strategies!
Subscribe to CyberBoo for more in-depth cybersecurity content. Share your thoughts and questions in the comments—your feedback shapes our content roadmap!
